So rumor has it that internet users have the same attention span as goldfish, and the more we evolve as internet lovers, the shorter that span will get. With all the emphasis out there on building engaging sites that will engross the user hook, line, and sinker, it becomes easy to forget some other important aspects, like building sites not just to spellbind users with fantastic front-end, but making sure that the back-end admin of a site is just as captivating in its clarity and ease of use.
There’s nothing worse than logging into a site and becoming bewildered with a dashboard that has too many options or just isn’t organized enough to find what you need immediately. And although we can’t control this on every site, in WordPress, you can do yourself and your users a favor by eliminating anything that’s clunky and confusing.
Quick Tips, No Code, Pinky Swear
Before we delve further, there are a few best practices that can help you organize your dashboard without a line of code. No code yet, I promise.
- Taking advantage of page hierarchy – we went over this a bit in a previous post. Even if you’re not using this feature for page templates, you can still use it to organize. (See screenshot-A)
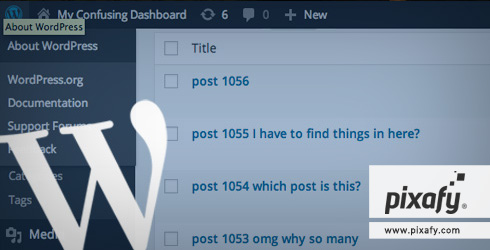
Screenshot-A
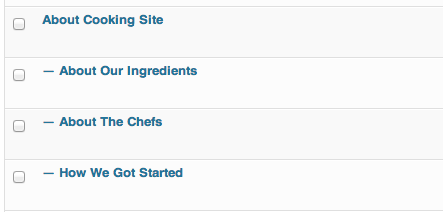
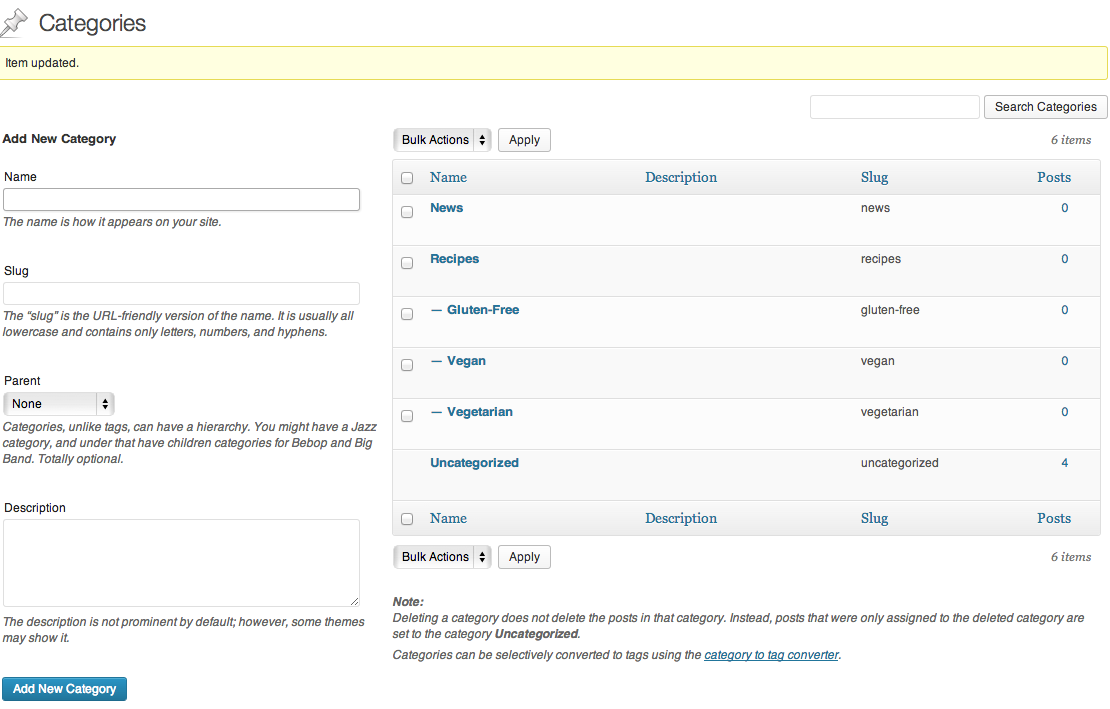
- Using Categories and Tags efficiently not only improves SEO, but can help the user filter their posts easier. (See screenshot-B & screenshot-C)
- Screenshot-B

- Screenshot-C
- Unchecking meta-boxes in the screen options on the upper right hand side of a page/post admin area. If your user isn’t going to be changing authors, adding comments from inside of a post and so on, you can hide these meta-boxes in the Screen Options by making sure they’re unchecked, and it will reduce unnecessary clutter.
These non-code tips should be a big help already, but there is more to be done using functions in functions.php. All you need is some prior theming knowledge and a bit of bravery if this file is still unfamiliar to you.
WordPress does a good job explaining what this file does – so instead of re-inventing the wheel; I’m here to show you how to use this file to make your admin dashboard as manageable as possible for whoever’s going to be using it.
Disabling Unnecessary Features
The first thing that will help us get the dashboard organized is removing any features on the Dashboard that are expendable. This is a combination of knowing what your client is going to be using this dashboard for, and knowing the design of the site.
One of the features I immediately analyze are post formats. If the theme you’re using supports these, you will see a meta box when you’re inside the admin screen of a post with radio buttons to choose between formats. On sites like Tumblr, choosing what format you’re posting will change the design of that post to fit its purpose. This feature in WordPress aims to do the same – style each post differently depending on its purpose. But if your client won’t be making a blog or simply won’t have different designs for their posts, this is something we can simplify or get rid of altogether.
Find this in functions.php and remove whatever formats are nonessential:
add_theme_support( 'post-formats', array( 'aside', 'image', 'link', 'quote', 'status' ) );
If you’re removing them all and just leaving the standard post format, replace the above with this:
remove_theme_support( 'post-formats', array( 'aside', 'image', 'link', 'quote', 'status' ) );
If you look up remove_theme_support() in the Codex, you will see that you can also remove Post Thumbnails (featured images), Menus, and a few other features. Most of the time, you will need these features, but if not, feel free to use this function for those as well.
In Conclusion
Now that we’ve gone over a few quick tips and learned how to disable post formats, your dashboard should be looking cleaner already. After all, no one likes redundant options or a hodgepodge of meta-boxes on the admin screen. But there’s still more to do! In part 2 of this series, we’ll take a look at custom post types and how they can help us keep the UI manageable and goldfish-approved!
Well, maybe not goldfish…
Stay tuned for part II!
What WordPress pain points do you have? Did this help simplify your workflow? We’d love to hear from you, so drop us a line in comments or tweet us @Pixafy!