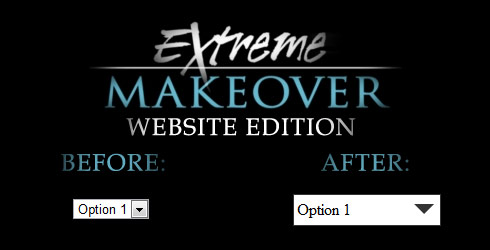
Select boxes are always a hassle to style. Each browser treats what you can do to them differently and the sizing never seems to be exactly the same. With CSS3 we have a lot more to work with, but that is not always an option especially when working with IE7 and 8. So what is a good way to get a much more consistent look? We look to Javascript, namely jQuery for the answer.
This gives us two options. The first is:
“The Hidden Box”
This one is fairly simple. You need to create a div or a span with the styles exactly as you want it and over lay an invisible select box over it. Here is how the HTML looks:
<div>
<div id="fakeText"></div>
<select id="realSelectBox">
<option value="1">Option 1</option>
<option value="2">Option 2</option>
</select>
</div>
Now with a little CSS we want the select box to be hovering over our div. What needs to be done in add a position of absolute to our select box and give set it’s coordinates to top:0 and left:0 plus a width of 100%. Now we don’t want the select box to be in the top left of the screen going all the way across, so we add a position relative to select-wrapper and the select box’s position and size will be relative to our select-wrapper. Finally we want to z-index the select box over the fakeSelectElement div. Take a look at the CSS to get a better idea:
.select-wrapper{
position:relative;
}
.realSelectBox{
position:absolute;
top:0;
left:0;
width:100%;
z-index:10;
}
.fakeSelectBox{
border:1px solid #333333;
padding:5px;
width:100%;
height:14px;
}
What’s the point of the z-index? All elements by default have a z-index of auto which technically means 0. By changing the z-index to 10, we are forcing our select box to appear over other elements inside the select-wrapper.
The next step is to create the styles we want on the div that will be the fake select box. This is what the user will see so we need to make it look good!
.fakeSelectBox{
border:1px solid #333333;
padding:5px 0;
width:100%;
}
Now this is looking good but the select box is in the way, let’s change those styles just a bit:
.realSelectBox{
position:absolute;
top:0;
left:1px;
width:100%;
opacity:0;
filter:alpha(opacity = 0);
border:0px solid;
padding:5px 0;
z-index:10;
}
We now are looking really good! But something is still missing…you guessed it: the dropdown arrow! How are we going to replace that? It’s not nearly as hard as you think. First we add a new div under the fakeSelectBox:
<div>
<div id="fakeText"></div>
<div></div>
<select id="realSelectBox">
<option value="1">Option 1</option>
<option value="2">Option 2</option>
</select>
</div>
I have named the class arrow-down because that is exactly what we want, a down arrow.
Here is the CSS:
.arrow-down {
position:absolute;
right:5px;
top:10px;
width: 0;
height: 0;
border-left: 10px solid transparent;
border-right: 10px solid transparent;
border-top: 10px solid #333333;
z-index:10;
}
Where’s the image, you ask? Well with this trick we don’t need an image. Just choose the color you want for your image and make it your border-top. Your border left and right need to be transparent. Now make them all the same width and be amazed. If you want to know more about how this works feel free to ask in the comments.
Back to the drop down, it is looking really good. Now, let’s add the jQuery to make the text appear. The first thing we need to do is create a document ready function to put all of our code in. I will use the shorthand version:
$(function() {

});
The next thing we need to do is grab the text of from the select box and append it to the fakeSelectBox. You may have noticed that earlier I added an id to the fakeSelectBox called fakeText. We also have had an id on realSelectBox. This will make selecting these two easier:
$(function() {
var currentText = $('#realSelectBox option:selected').text();
$('#fakeText').text(currentText);
});
The first line is creating a variable currentText. When the page loads we are taking the option that is selected (using “option:selected”) and coping it’s text to this variable. The second line texts the current text and adds it to the fakeText div. Thus you should see Option 1 is visible now.
The final thing we need to do it change the text every time the select box’s value changes (every time the user selects the option they want):
$(function() {
var currentText = $('#realSelectBox option:selected').text();
$('#fakeText').text(currentText);
$('#realSelectBox').change(function() {
currentText = $(this).find('option:selected').text();
$('#fakeText').text(currentText);
});
});
It looks like I’ve added quite a bit, but really I haven’t; most of it is a copy/paste of the lines we just wrote, with some minor but important changes.
The first new line is the change event itself. For those of you that know native JS, this is the jQuery equivalent as the onchange event. Inside this event function we have our copied lines. The first change is to remove the var from before current Text. This means we are changing the same variable from earlier, not creating a new one in this scope.
The next change is instead of using $(‘#realSelectBox option:selected’) again, we can use $(this)find(‘option:selected’). To put simply we have selected realSelectBox in the change event already. realSelectBox is represented by $(this). We then need to find the selected option within realSelectBox, so that is what .find(‘option:selected’) is for. Get the text value and making the currentText show up in the div is the same as before.
To make things easier to understand and so that you can play around with everything explained here (the best way to learn a lot of things), I’ve created a jsFiddle for everyone:
Want another approach? I’ve got another method that I like to call “The Total Faker.” In this method we don’t even use a select box at all, but get all the UI benefits!
Questions or comments? Share them below, or tweet us @Pixafy!


